Persona 5 - Leblanc Cafe

Team A:
Jaime Diaz: https://diazjaime956.wixsite.com/leblanc-cafe
Erin Jarrett: https://www.erinrjarrett.com/game-environment
Sarah Jecker: https://sarahjecker9.wixsite.com/my-site
Jonathan McMahan: https://jpmcmahan00.wixsite.com/website-3/home-page
Shelby Way: https://sway2319.wixsite.com/gamenvironment
Jolena Yao
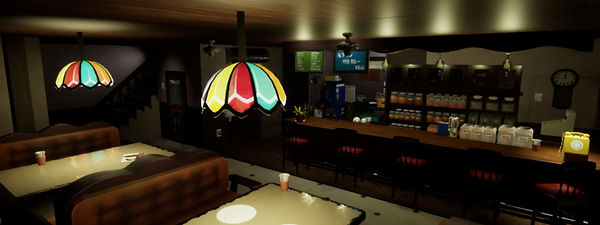
For this project, my team chose to recreate the Leblanc Cafe from Persona 5.
I was responsible for:
Shelves (all aspects)
Telephone (all aspects)
Tile floor (texturing - made the material in substance designer)
Air conditioner (texturing)
Bar (texturing)
Bar chairs (texturing)
Booth table (texturing)
Ceiling Fan (texturing)
Coffee Grinder (texturing)
Cutting board (texturing)
Front door (texturing)
Hanging Pan + ladles (texturing)
Kitchen cans (texturing)
Walls + tile floor (texturing)
Menu signs (texturing)
Tall pot (texturing)
Wall divider (texturing)
Wavy wood piece (texturing)
Shelves - All Aspects
I was responsible for all aspects of the shelves, including modeling, UV unwrapping, and texturing. For the modeling, I started off with a cube primitive in the rough dimensions of a shelf. I decided to model one of the shelves to start with, and then duplicating and adjusting certain parts later on. In my initial pass at the modeling, I started off with offset extruding the front face in to create an empty space for the shelves and upper cabinet to go in. However, after putting in the other parts of the shelf and attempting to bevel the edges, I was getting weird errors so I tried a different approach with using the multi-cut tool to section off the parts, extrude that in, and bevel. I added the shelf pieces back in and beveled those as well. For the upper cabinet part I just did an offset extrude in for the glass part and I was able to bevel the edges for those pieces without any issues. I duplicated the shelf two times, adjusting the top piece that juts out to create the wall of shelves.


I UV unwrapped the cabinets and proceeded to bring the model into substance painter. I used a wood texture to start and edited the parameters to get the look I was going for. To create the glass of the cabinet portions of the shelves, I used the glass visor smart material and changed the shader I was using to a PBR metal rough with alpha blending and used the opacity channel to create the transparency of the glass. I then went in with the extra details of wear and tear around the edges of the cabinets, as well as some smudges on the glass.

Telephone- All Aspects
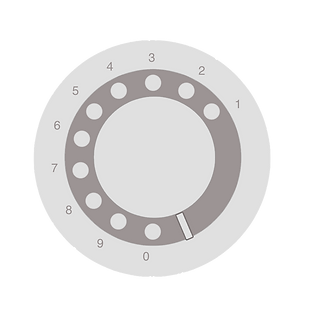
I was responsible for all aspects of the telephone, including modeling, UV unwrapping, and texturing. For the model, I started off with a cube and made the size in the rough dimensions of the telephone from the reference images. I added an edge loop around the bottom third of the model where the telephone changes slightly. I then brought the front two vertices on the top back to create the shape of the telephone. I had a larger bevel on the two sides to create the wide edges seen in the reference. After that I beveled all the edges around the telephone to avoid sharp edges. For the dial I used a cylinder with 20 segments, and beveled the edge of that as well. For the ear of the telephone, I used half of a cube that was rounded to create the ends of the phone and used a NURBS curve to extrude the face along the curve for the part in-between them. I also rotated the two endpieces of the phone to better match the reference image. The phone support was created with cubes that I scaled down to the right size, segmented off, deleted the faces in the middle to create the opening for the phone to rest on, and then bridged between the edges to close off the holes. For the bottom of the phone pieces I extruded the bottom ring out slightly to create some definition seen in the reference, and also beveled the edges. I did the same for the bottom third of the phone body, to add definition and distinction between the lower part of the phone body and the top. For the phone cord I used a helix primitive and a lattice deformer to position the cord and make it curve towards the bottom of the phone body where it connects. For the leg pieces I used a cube that I scaled the bottom in slightly to taper and beveled the edges.

I UV unwrapped it and brought the model into substance painter to texture. I used a plastic matte texture as a base for the phone, making two separate layers for the yellow portions of the phone and the more cream/off white portions of the phone. For the dial I created the image that would be stamped onto the model in Clip Studio Paint, following as closely to the reference image as I could. After stamping the image onto the model, I went in and used a brush to decrease the height a little in the areas with the holes of the dial and raise the height slightly of the middle ring to create some slightly distinction (though the reference image just had the dial stamped on). I also used a brush to draw in the rectangular indentation towards the bottom right of the phone body. After that I painting in wear and tear on the model to add some extra detail and life into it.


Tile Floor + Walls (texturing)
I created the tile floor material in Substance Designer, which was an interesting challenge to take on since I have never used Substance Designer before. The square tile pattern and the diamond pattern were separated to make it a bit easier to manipulate each part specifically. For the tile pattern, the shape was beveled and put into a tile generator, which was then plugged into a slope blur grayscale node along with a perlin noise node to add waviness into the lines of the tile. The diamonds were made in a similar manner, with the shape going into a bevel and into a tile generator, and a subsequent levels node to add adjustments.

For the height and normal maps, it was a combination of several different nodes and playing around with the parameters to create the details on the surface of the tiles, including the flecks that are cutting into the tile. Similarly, the color base color was a combination of several different nodes to layer on noise, grunge, and gradients to achieve the desired look. It was a bit hard to tell the color of the tiles from the reference images, but I ended up making them a beige color (with the darker beige incorporated with the noise node) and a dark blue for the diamonds.


After the material was done in Substance Designer, I both exported it as bitmaps and as sbsar file. I imported the sbsar file into Substance Painter and applied it to our building model. I had to play around the with parameters in substance painter to get it to fit the model and look the way I wanted, which included adding a height adjust filter to tone down some strange things that were happening with the height map. Looking at the reference images, I made the best judgment I could with what the walls looked like, which was a bit hard due to poor lighting in the game and limited angles. I added wood trim along the walls, as well as a blotchy desaturated pink for the non-wood portions. I had to add several layers of the wood with masks to rotate the texture and get the grain running in the proper direction (since the UV shell was curved). I also made the kitchen area darker, based on feedback from a team member. Beside the shelves there was a wood portion the had the wood running vertically, so I added that in as well.

Bar and Bar Chairs (texturing)
For the bar, I started off by adding a wood texturing and editing the parameters to my liking. I duplicated the wood layer, rotated the texture, and only masked in the areas of the bar that I wanted the grain to run horizontally (mainly the trim around the bottom and the edges of the counter). After realizing the textures were looking off, I noticed the UV shells weren't laid out so I imported the model into Maya to lay out the UV shells and UV unwrap the metal rings since they didn't seem to have UV shells. After this I went back into substance painter and added a height layer, which I used to decrease the height of the lines I painted in to create the look of wood panels. I added a rough steel material to the pipe at the bottom of the bar. I then went in with a few different fill layers and masks to paint in worn areas of the bar and some scratches on different areas.


With the bar chairs, I started with a wood texture for the main parts of the chair, again changing the parameters until I liked the base outcome. I also duplicated the wood layer and rotated it to make the grain on the legs of the chair, as well as the bars on the back run vertically. I used the fabric synthetic dots smart material and edited the color and scale of the material, since the dots on the original material were too large for the model. Once I had the base materials down, I painted in the wear and tear on the wood and the cushion in a couple of different fill layers with black masks, keeping in mind which areas would be the most worn.


Front door (texturing)
For the front door I used/edited a wood material for the main part of the door, and similar to previous models I duplicated the wood layer, rotated it so the grain ran horizontally, and masked in the areas that needed the horizontal grain (the wood panels running horizontally inside the frame). The glass was done the same way as described earlier with the cabinet, with the addition of a fill layer to add in the block of color on every other glass panel on the left side. These parts were more opaque than the regular glass, but you can still see through them slightly. The door handle and the bell were both a copper material, with the parameters changed. I then went back and added the wear and tear on the wood, particularly around the edges of the different parts. For the glass I noticed in the reference image that the glass had a bit of dirtiness/worn areas around the edges of all the glass panels, so I painted that in as well. For the door handle I painted in worn areas and smudges where people would have been touching the handle the most. I also painted some wear and grungy spots on the bell to show age.

Menu Signs + Wavy Wood Bar + Wall Divider
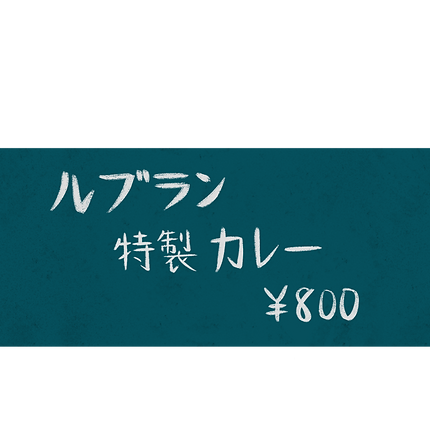
For the main structure of the menu signs, I used/edited a wood material on a couple of different layers, one for the wooden bar and one for the actual sign frames (with the sign frames being a darker brown). I also masked in a rough steel material for the metal parts of the model that hold up the signs. As usual, I added in worn areas, paying particular attention to the edges. I made the actual sign portions in procreate, that I later imported into substance painter to stamp onto the models. I took a year of Japanese when I was an undergrad student, so I was fine to write the Japanese that shows up on the signs. The blue sign was the actual wording in the game, since that was clear enough from the reference image for me to read. The green sign in the reference was too blurry/low-res for me to decipher, so I just wrote several different drink options that you would see at a cafe. I didn't want the background colors to be just a plain color, so I painted in some texture into it with a few different brushes in procreate. It was challenging to get the proportions of the image right when I imported it into substance to stamp on, so I ended up going back and forth between procreate and substance to get the sizing right.


For the wavy wood model, I used the same wood and parameters that I did for the menu signs, since the wavy wood is in the same area/a part of the same structure as the menu signs in the reference image. I also painted in the worn edges as well as some scratches on this model just to add more interest and detail.

To texture the wall divider, I used and edited the same wood material as the menu signs and wavy wood section. As with all the models, I added in the worn edges and scratches to the model.

Booth Table
For the booth table, I used a rough iron material to use as a base, and used the same iron material but in a gold color for the band around the leg of the table. For the surface of the table I used and edited the parameters of a grainy plastic material, masking in the general area of the surface that wasn't metal. I then went in with a few different brushes to mask in the irregular edges of the plastic surface, since it wasn't just a straight line between the table material and the metal edge. I added a dirt filter to the plastic material as an overlay layer at 25% opacity, just to get the color variation without going too far. I then painted in some worn areas and dirt onto the metal parts of the table.


Coffee Grinder + Ceiling Fan
To start off, I masked in the areas of the coffee grinder that had either a wooden material or a metallic one. For the wooden parts I had to duplicate the layer, rotate the material so the grain was running horizontally, and mask in the areas that didn't already have the grain running in the right direction. I painted in the worn parts of the wood and also added smudges on the metal parts .


For the ceiling fan I masked in the areas that were wood, metal, and glass and edited the parameters for the different materials. I added a dirt filter to the metal part with a lowered opacity, just to get some variation on the metal.

Tall Pot + Kitchen Cans + Hanging Pan + Cutting Board + Air Conditioner
With the tall pot I used a metal material and went back with a few different brushes to paint on some smudges, scratches, dirtier areas, and splatters (near the spout).

For the cans I used a rougher metal material and painted on dirtier areas of the cans.

The hanging pans had a steel material applied to them, which I edited the parameters to fit the scale of the models.

For the air conditioner, I applied an iron material and tried to follow the reference images for the portions of the air conditioner that were darker. I painted in the darker areas onto the model, and used a brush with a decreased height map to create some definition around the dark area on the top .
